
Measure and mark panel frames according to workspace dimensions. Use a trim saw to cut openings for cable management, ensuring 1-inch margins. Secure wall start junctions to studs or drywall fasteners for stability.
Steelcase Panel Systems are versatile and scalable solutions designed to create functional and modern workspaces. These systems are widely used in office environments to provide privacy, organization, and flexibility. With a focus on durability and aesthetics, Steelcase panels are constructed from high-quality materials, ensuring long-lasting performance. They are available in various configurations, including floor-to-ceiling and desk-mounted options, to suit different spatial needs. The panels are designed to integrate seamlessly with other office furniture, creating cohesive and productive environments. Whether for individual workstations or collaborative spaces, Steelcase Panel Systems offer a balance of functionality and style. Their modular design allows for easy customization, making them adaptable to evolving workplace requirements. Additionally, these systems support cable management solutions, ensuring a clutter-free and efficient workspace. Steelcase panels are also designed with sustainability in mind, aligning with modern office design trends. By combining innovation and practicality, Steelcase Panel Systems are a trusted choice for creating tailored workspaces that prioritize both productivity and comfort.
Understanding the Components
Steelcase Panel Systems consist of several key components that work together to create a functional and customizable workspace. The primary components include panel frames, which serve as the structural foundation, and panel surfaces, available in various materials like glass, fabric, or solid laminate. These surfaces can be easily mounted onto the frames to achieve the desired aesthetic and functionality.
Additionally, the system includes connectors and hardware, such as clamps, brackets, and screws, which are essential for securing the panels and frames together. Junctions are another critical component, allowing panels to be connected at angles or in straight lines. They also feature slots for integrating cable management solutions, ensuring wires and cables remain organized and concealed.
Understanding each component’s role is crucial for proper assembly and customization. The modular design of Steelcase Panel Systems enables users to mix and match components to suit specific spatial and functional requirements. This flexibility makes the system ideal for creating tailored workspaces that balance productivity, privacy, and style.
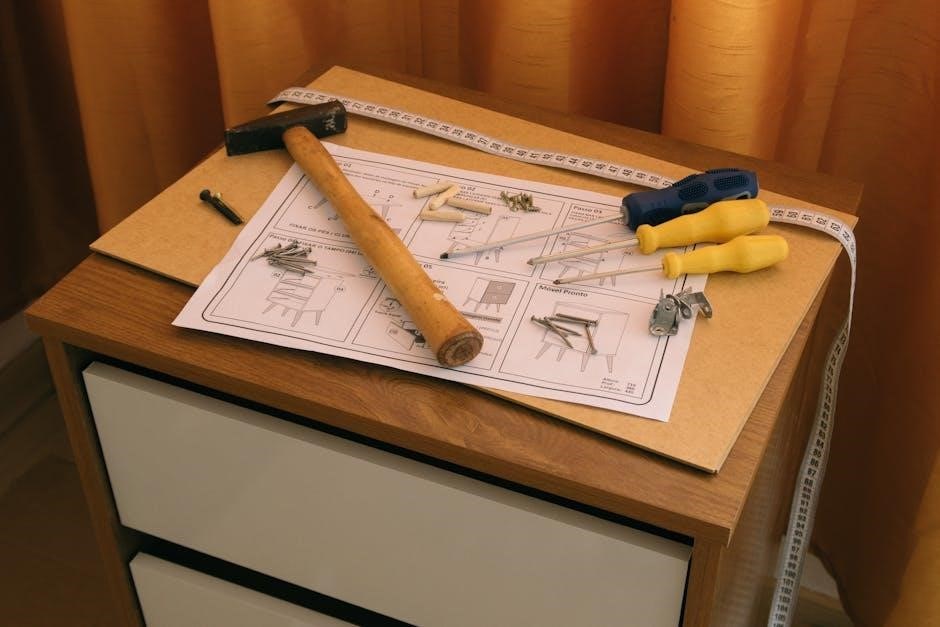
Tools and Materials Required
To successfully assemble a Steelcase Panel System, you will need specific tools and materials. Essential tools include a trim saw or similar cutting tool for precise cuts, a drill for creating pilot holes, and a screwdriver or Allen wrench for securing hardware. Additionally, a measuring tape and level are crucial for ensuring accurate alignments and proper installation.
Materials required include the panel frames, surfaces, and connectors provided in the Steelcase kit. You may also need drywall fasteners or structural wall anchors for securing the system to the wall. For cable management, cable ties or trays are recommended to keep wires organized. Other optional materials, such as decorative trim, can be added to enhance the system’s appearance.
Having all tools and materials ready before starting the assembly ensures a smooth and efficient process; Organize the components and hardware to avoid confusion and minimize assembly time. Always refer to the Steelcase manual for specific material requirements tailored to your system.
Preparing the Workspace
Before starting the assembly of your Steelcase Panel System, it is essential to prepare your workspace to ensure efficiency and safety. Begin by clearing a large, flat area of any debris or obstacles. Cover the floor or table with a drop cloth to protect it from dust or scratches during cutting and drilling. Gather all components, tools, and hardware in one place to avoid unnecessary movement during assembly.
Use a measuring tape and level to mark the installation area according to your workspace dimensions. Ensure the floor is level and stable to prevent uneven panel installation. If cutting panels, position them securely on a sturdy work surface and use clamps to hold them in place. Wear protective gloves and safety goggles when cutting or drilling to avoid injuries. Finally, ensure adequate lighting to clearly see your work. Proper preparation will streamline the assembly process and help achieve professional results.
Step-by-Step Assembly Process
Begin by assembling the base structure, ensuring all vertical frames are aligned and securely connected using the provided hardware. Use a measuring tape and level to verify accuracy. Next, attach the horizontal frames to the vertical ones, creating a sturdy skeleton for the panels. For cable management, carefully cut rectangular openings in the panels using a trim saw, setting the blade to protrude 1/8 inch or less, and leave a 1-inch margin around the edges.
Secure the wall start junctions to studs or drywall fasteners, ensuring stability. Vertical trim is not required for this system. Align the panels with the frames and attach them using the provided connectors. Tighten all hardware firmly but avoid overtightening. Finally, integrate cable trays and powerkits into the junction slots for efficient cable routing. Double-check all connections and ensure the system is level before completing the installation. Follow the provided assembly videos or PDF guides for additional clarity. This structured approach ensures a seamless and professional assembly of your Steelcase Panel System.
Installing the Panel Frames
Start by measuring and marking the workspace to ensure accurate placement of the panel frames. Use a measuring tape and level to align the frames properly. Secure the wall start junctions to studs or drywall fasteners, as these provide the foundation for the panel system. Vertical trim is not required for this installation. Once the junctions are in place, attach the vertical frames, ensuring they are plumb and evenly spaced. Use the provided hardware to connect the frames securely.
Next, measure and cut the horizontal frames to fit between the vertical ones. Use a trim saw for precise cuts, setting the blade to protrude 1/8 inch or less. Attach the horizontal frames to the vertical ones, ensuring a snug fit. Leave a 1-inch margin around any cable openings to accommodate future cable management. Double-check all connections for stability and alignment before proceeding. This step ensures the structural integrity of the panel system, providing a solid base for the panels and hardware. Refer to the assembly guides or videos for additional clarity.
Attaching the Panel Surfaces
Once the panel frames are securely installed, the next step is to attach the panel surfaces. Start by aligning the panel surface with the frame, ensuring proper fit and alignment. Use the clips or fasteners provided to secure the panel to the frame. Typically, these clips are designed to snap into place or require a screwdriver for tightening. Begin at the top of the panel and work your way down to maintain even alignment and prevent the panel from shifting during the process.
Ensure the panel is flush with the frame to avoid any gaps or unevenness. If the panel surfaces come with pre-drilled holes, align them with the frame’s mounting points. For panels with adhesive strips or Velcro-like attachments, peel off the protective covering and press firmly to secure. For heavier panels, consider enlisting assistance to lift and position them accurately.
Examine the edges of the panels for interlocking parts or butted joints. Ensure a tight seal between panels to maintain structural integrity and appearance. Look for alignment marks or guides on the frames to help position the panels correctly. After attaching a few panels, test their stability by gently tugging on them. If any feel loose, tighten the clips or adjust the panel’s position.
Plan the placement of panels with cable management openings to ensure proper routing. Attach panels strategically to provide access for cables as needed. Double-check each panel’s securement and alignment before moving on. If unsure about any step, refer to the assembly guide or video tutorials for clarification. Taking your time and focusing on precise alignment will result in a sturdy and visually appealing panel system.
Securing the Connectors and Hardware
After installing the panel frames and surfaces, the next critical step is securing the connectors and hardware. Begin by tightening all bolts, screws, and clips that hold the panel surfaces in place. Use an Allen wrench or screwdriver, depending on the type of fasteners provided. Ensure all connections are snug but avoid overtightening, which could damage the panels or frames.
Inspect the horizontal bars, cable trays, and powerkits to ensure they are properly attached to the junctions. Use the slots in the junctions to secure these components, aligning them with the pre-drilled holes. If applicable, attach the vertical trim to the panels for a seamless finish. Tighten all connectors firmly to prevent any movement or instability.
Double-check that all hardware, such as brackets and fasteners, is securely in place. If using locknuts or washers, ensure they are properly seated to prevent loosening over time. Finally, verify that all connectors are aligned and tightened evenly, providing structural support to the entire panel system. This step ensures the system remains stable and functional for years to come.
Integrating Cable Management Solutions
Once the panel frames and surfaces are securely in place, focus on integrating cable management solutions to maintain a clean and organized workspace. Begin by routing cables through the openings you created in the panel surfaces. Use cable trays or powerkits to organize and conceal wires, ensuring they are neatly arranged and accessible. Secure the cables to the panels using cable clips, ties, or adhesive-backed cable organizers to prevent them from coming loose over time.
Utilize the slots in the junctions to install cable trays or horizontal bars, which provide a pathway for cables to run beneath the top caps. This feature allows for easy access and keeps cables hidden from view. Ensure all power and data cables are properly connected to their respective outlets or devices. Finally, test all connections to confirm they are functioning correctly. Proper cable management not only enhances the aesthetic appeal of your workspace but also improves functionality and safety.
Final Adjustments and Alignment
After completing the assembly and securing all components, perform a final inspection to ensure proper alignment and stability of the Steelcase panel system. Use a level tool to verify that all panels are straight and evenly positioned. If necessary, adjust the panel frames by loosening the connectors slightly and repositioning them until they align perfectly.
Check that all surfaces are flush and evenly spaced. Tighten any loose hardware or connectors to ensure the structure is secure and stable. Inspect the cable management system to ensure wires are neatly organized and not pinched or damaged. Finally, verify that all doors, drawers, or other movable components function smoothly and are properly aligned.
Make sure all gaps between panels and frames are consistent for a polished appearance. Once everything is aligned and secure, your Steelcase panel system is ready for use, providing a functional and visually appealing workspace.
Troubleshooting Common Issues
During the assembly of the Steelcase panel system, you may encounter issues such as misalignment, loose connections, or difficulties with cable management. If panels appear uneven, check that all frames are securely attached and adjust as needed. Use a level tool to ensure proper alignment. For loose connections, verify that all hardware is tightened properly and that connectors are fully engaged.
If cables are not routing smoothly, inspect the cable management slots and ensure they are free from obstructions. If a panel surface is not fitting correctly, double-check that it is aligned with the frame and that all clips or fasteners are securely attached. If issues persist, consult the assembly instructions or contact Steelcase support for assistance.
Addressing these common issues promptly will ensure your Steelcase panel system functions as intended, providing a stable and organized workspace. Regularly inspecting connections and alignments can prevent future problems.
Maintenance and Upkeep Tips

Regular maintenance is essential to ensure the longevity and functionality of your Steelcase panel system. Start by cleaning the surfaces with a mild detergent and water to prevent dust and dirt buildup. Avoid harsh chemicals that may damage the finishes. Inspect the panel frames and connections periodically to ensure they remain secure and properly aligned.
Check the cable management systems for any blockages or damage. Use a soft cloth to wipe down electrical components and connectors to maintain conductivity. If you notice any loose hardware, tighten it immediately to prevent instability. For panels with adjustable features, lubricate moving parts annually to ensure smooth operation.
Refer to the Steelcase user guide for specific care instructions tailored to your system. Addressing minor issues promptly can prevent larger problems from developing. By following these maintenance tips, you can keep your Steelcase panel system looking and performing like new for years to come. Regular upkeep ensures a safe, efficient, and professional workspace.
Warranty and Support Information
Steelcase products, including panel systems, are backed by a comprehensive warranty program designed to protect your investment. Most Steelcase panel systems come with a limited warranty that covers defects in materials and workmanship for a specified period, typically up to 10-12 years, depending on the product line.
To ensure warranty coverage, register your product on the Steelcase website or through their customer service team. This process helps verify ownership and streamline any future support requests. For issues arising during the warranty period, contact Steelcase directly for troubleshooting, repairs, or replacements.
Steelcase offers extensive support resources, including online troubleshooting guides, assembly instructions, and downloadable user manuals. Their customer service team is available to address inquiries and provide solutions tailored to your specific needs. Additionally, authorized Steelcase dealers can assist with warranty claims and maintenance services.
Visit the Steelcase website or consult your product’s documentation for detailed warranty terms and conditions. By leveraging Steelcase’s robust support network, you can ensure your panel system remains functional and meets your workspace requirements for years to come.