
Welcome to the AirSense 10 manual, your comprehensive guide to setting up, operating, and maintaining your CPAP device for optimal sleep therapy.
This manual provides detailed instructions to help you understand and use the AirSense 10 effectively, ensuring a comfortable and safe experience.
Designed to assist users in achieving the best results, this guide covers key features, troubleshooting, and maintenance tips for your AirSense 10 device.
Consult this manual regularly to ensure proper usage and maximize the benefits of your CPAP therapy.
Overview of the AirSense 10 Device
The AirSense 10 is a advanced CPAP device designed for treating obstructive sleep apnea (OSA). It offers features like auto-adjusting pressure, a built-in humidifier, and a light sensor for screen brightness. Lightweight and user-friendly, it ensures comfortable therapy at home. Available in models like AutoSet for Her, it caters to diverse patient needs. The device is intended for patients over 30 kg, providing a reliable solution for uninterrupted sleep. Its design focuses on ease of use and personalized therapy settings.
Importance of the Manual for Proper Usage
The AirSense 10 manual is essential for safe and effective use of the device. It provides clear instructions for setup, operation, and maintenance, ensuring optimal therapy. By following the manual, users can troubleshoot issues, understand error codes, and maintain device performance. Proper usage enhances comfort and therapeutic outcomes, making the manual a vital resource for patients and caregivers. Regularly consulting the guide helps users maximize the benefits of their CPAP therapy and adapt to individual needs for better sleep quality.

Key Features and Specifications
The AirSense 10 features Auto-Adjusting Pressure Technology, a Light Sensor for screen brightness, and an Integrated Humidifier for enhanced comfort and therapy efficiency.
Auto-Adjusting Pressure Technology
The AirSense 10’s Auto-Adjusting Pressure Technology automatically adjusts therapy pressure to meet individual needs, ensuring effective treatment of obstructive sleep apnea (OSA) throughout the night.
This advanced feature continuously monitors breathing patterns and adapts pressure levels to prevent apneas, providing a more comfortable and tailored therapy experience.
By dynamically responding to changes in airway resistance, the device ensures consistent airflow, promoting uninterrupted sleep and improving overall therapy outcomes.
Light Sensor for Screen Brightness Adjustment
The AirSense 10 features a built-in light sensor that automatically adjusts the screen brightness based on the ambient light in the room.
This innovative feature ensures the display is dimmed in low-light conditions, reducing glare and promoting a restful sleep environment.
The sensor responds to changes in room lighting, providing optimal screen visibility while minimizing disturbances during therapy sessions.
This convenient feature enhances user comfort and ensures the device remains unobtrusive, even in darkened bedrooms.
Integrated Humidifier for Comfort
The AirSense 10 includes an integrated humidifier designed to enhance comfort during therapy by adding moisture to the air.
This feature helps prevent dryness in the nose, throat, and airways, promoting a more comfortable sleep experience.
The humidifier is built directly into the device, eliminating the need for separate components and simplifying setup.
Users can adjust the humidity levels to suit their preferences, ensuring optimal comfort throughout the night.
Regular cleaning and maintenance of the humidifier, as outlined in the manual, are essential for its effectiveness and longevity.

Setting Up the AirSense 10
Setting up your AirSense 10 involves unpacking, connecting the tubing, and configuring initial settings for a seamless therapy experience.
Step-by-Step Installation Guide
Begin by unpacking the AirSense 10 device and accessories. Place the machine on a stable surface, ensuring good airflow. Connect the power cord and plug it into a nearby outlet. Attach the air tubing to the device and the mask. Next, fill the humidifier chamber with distilled water if using. Finally, turn on the device and follow the on-screen prompts to complete the setup process. Proper installation ensures optimal performance and comfort during therapy.

Connecting the Tubing and Mask
Attach the air tubing to the AirSense 10 device by aligning the connector securely. Ensure the tubing is not kinked or blocked for proper airflow. Connect the mask to the other end of the tubing, making sure it fits snugly. If using a humidifier, attach the tubing to the humidifier chamber first. Once connected, turn on the device and check for any leaks by gently tugging the tubing. Proper connection ensures effective therapy and prevents air leaks during sleep.
Initial Settings Configuration
Navigate to the settings menu on your AirSense 10 device to configure initial therapy settings. Select the appropriate pressure level or mode (CPAP, AutoSet, or For Her). Adjust the ramp time and humidity levels according to your comfort preferences. Ensure the Start Therapy option is enabled to begin treatment. For precise settings, consult your healthcare provider or refer to the user guide for detailed instructions. Proper configuration ensures a personalized and effective sleep therapy experience tailored to your needs.

Operating the AirSense 10
The AirSense 10 operates efficiently with a user-friendly interface, offering straightforward controls for starting therapy, adjusting settings, and monitoring sleep data to ensure effective treatment.
Starting Therapy
To begin therapy with the AirSense 10, ensure the device is properly set up and connected. Put on your mask, turn on the device, and allow it to start automatically. The machine will gradually adjust to your breathing pattern, providing the necessary pressure to maintain an open airway. If using AutoSet mode, the device will automatically adjust pressure levels throughout the night. Always follow the steps outlined in the manual for a safe and effective therapy experience.
Adjusting Pressure Settings
The AirSense 10 allows for easy adjustment of pressure settings to suit your needs. In CPAP mode, the pressure remains constant, while AutoSet mode automatically adjusts based on your breathing. To change settings, navigate to the “My Options” menu and select “Pressure.” Use the dial to adjust the pressure level, ensuring it aligns with your prescription. Always consult your healthcare provider before making changes. Regularly review your therapy data to ensure optimal settings for effective sleep apnea management.
Monitoring Sleep Data
The AirSense 10 provides detailed sleep data to track your therapy progress. The device’s built-in screen displays usage hours, pressure levels, and mask seal. For deeper insights, connect to the ResMed myAir app, which offers metrics like AHI, leak rate, and usage patterns. Regularly reviewing this data helps ensure your therapy remains effective. Use the navigation dial to scroll through screens and access therapy metrics. This data is essential for adjusting settings and maintaining optimal sleep apnea management. Monitor trends to identify improvements or areas needing adjustment.
Maintenance and Cleaning
Regular maintenance and cleaning are crucial for the AirSense 10’s effectiveness and longevity. Clean the mask and tubing with mild detergent, avoiding harsh chemicals. Replace filters as scheduled.
Refer to the manual for detailed cleaning instructions to ensure optimal performance and hygiene. Proper care extends the device’s life and maintains therapy effectiveness.
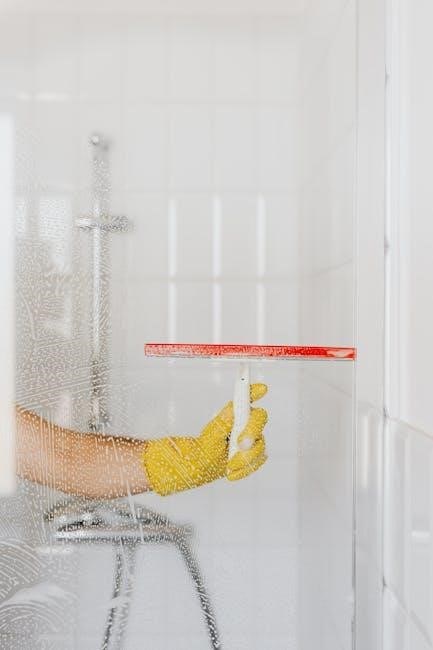
Cleaning the Mask and Tubing
Regular cleaning of the mask and tubing is essential for hygiene and optimal performance. Wash the mask with mild soap and warm water daily, then rinse thoroughly.
The tubing should be cleaned weekly using a soft brush and mild detergent to remove any buildup. Avoid using harsh chemicals or abrasive cleaners.
After cleaning, allow all parts to air dry completely before reassembling. This helps prevent moisture buildup and ensures your therapy remains effective.
Refer to the manual for detailed cleaning instructions to maintain your AirSense 10 device properly.
Replacing Filters
Regular filter replacement is crucial for maintaining hygiene and device performance. Replace the filter every 1-3 months or as indicated in the manual.
Turn off the device and unplug it before replacing the filter. Dispose of the old filter responsibly and install a new one, ensuring it clicks securely into place.
Use only ResMed-approved filters to ensure compatibility and effectiveness. Clean or replace the filter if it becomes visibly dirty or discolored.
Proper filter maintenance enhances air quality and prolongs the lifespan of your AirSense 10 device;
Regular Maintenance Schedule
Perform daily, weekly, and monthly checks to ensure optimal performance.
Clean the device exterior with a damp cloth weekly and inspect tubing for kinks or damage.
Replace filters every 1-3 months and check for visible wear on components like masks and straps.
Schedule professional servicing every 12 months to maintain device efficiency.
Regular maintenance ensures hygiene, prolongs device lifespan, and guarantees effective therapy outcomes.

Troubleshooting Common Issues
Identify and resolve common issues like device malfunction, noise, or connectivity problems. Consult the manual for solutions or contact support for assistance.
Resolving Mask Leaks
Masks leaks can disrupt therapy and reduce comfort. Ensure a proper mask fit by following the user guide’s fitting instructions. Adjust the headgear for a secure seal. Clean the mask regularly to maintain its integrity. Replace worn-out or damaged parts promptly. If leaks persist, consult the troubleshooting section of the manual or contact ResMed support for assistance. Regular maintenance ensures optimal performance and comfort during sleep therapy.
Fixing Sensor Malfunctions
Sensor malfunctions can disrupt therapy accuracy. First, restart the device by turning it off and on again. Ensure all connections are secure and free from blockages. Clean the sensors with a soft cloth to remove any debris. If issues persist, check for software updates or refer to the troubleshooting guide in the manual. Contact ResMed support if the problem remains unresolved. Proper sensor function ensures accurate therapy delivery and optimal sleep quality.
Understanding Error Codes
The AirSense 10 device displays error codes to indicate specific issues. These codes help identify problems such as low therapy pressure, high leak levels, or sensor malfunctions. Common codes include 1 (low pressure), 2 (high leak), 3 (invalid pressure), and 7 (high humidity). Refer to the user manual or the troubleshooting section to interpret codes and resolve issues. Restarting the device, checking tubing connections, or cleaning the air filter often fixes errors. Consult the manual or contact ResMed support for persistent issues.